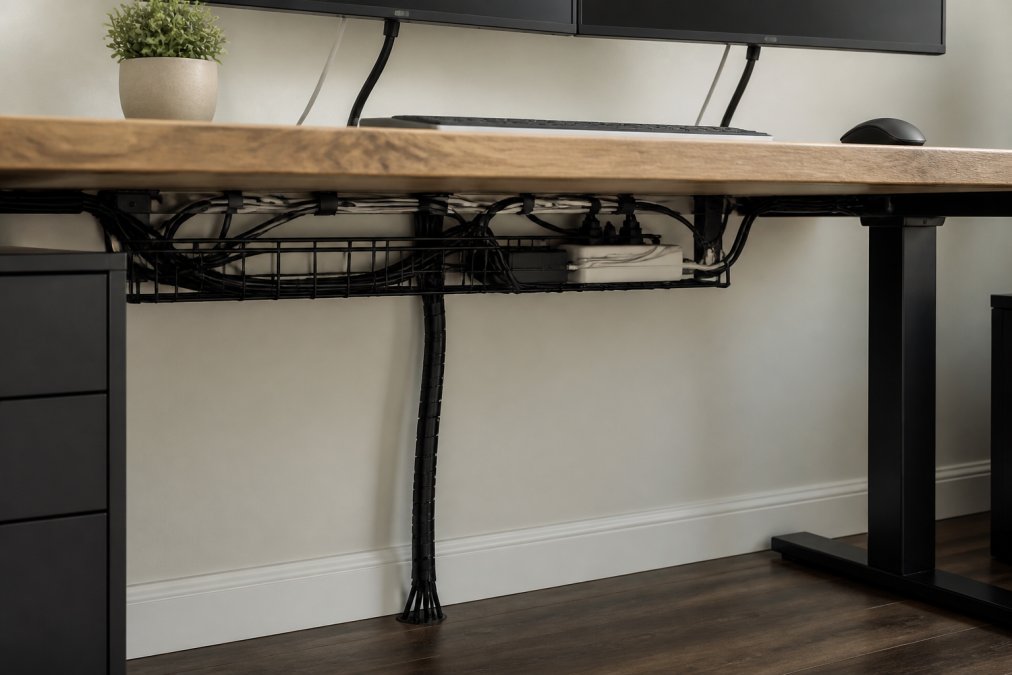
 how-to
How to Organize Desk Cables: A Step-by-Step Guide
Table of Contents
- What You'll Need Before You Start Organizing Desk Cables
- Step 1: Audit Your Cables and Measure What You Have
- Step 2: How to Hide Power Strips Under Your Desk
- Step 3: Group and Conceal Cables with Sleeves, Raceways, and Trays
- Step 4: Manage Charging Cables on the Desk Surface
- Best Cable Management Tools for a Home Office Setup
- Standing Desk Cable Management Ideas That Actually Work
- Common Mistakes to Avoid When Managing Desk Cables
Last Updated: August 3, 2026
Cord clutter is one of the most common productivity killers in home offices. This guide from Esther Tech Shop covers every method worth using, from mounting power strips to managing a full multi-monitor rig, so you can build a clean, functional workspace without spending a weekend on it.
A good cable management system is a technical decision that affects how easy it is to add new devices, troubleshoot connections, and keep your desk functional over time. Get the foundation right and every future upgrade takes minutes instead of hours.
What You'll Need Before You Start Organizing Desk Cables
Total Time: 45-90 minutes Difficulty: Beginner to Intermediate
Essential supplies:
- Cable ties or reusable velcro straps
- Adhesive cable clips
- Cable sleeves or cable loom
- A cable management tray or under-desk cable tray
- A cable raceway or wall-mounted raceway
- A power strip with adequate outlets
- Zip ties (for permanent bundling)
- A label maker or color-coded tape
- Measuring tape
The quality of your clips and sleeves matters more than most people expect. Cheap adhesive clips lose their grip within weeks, especially in warm rooms or on textured desk surfaces.
Step 1: Audit Your Cables and Measure What You Have
The biggest mistake with cable organization is skipping the audit. Most people grab a cable sleeve, stuff everything in, and wonder why the result still looks chaotic.
Start by unplugging every cable at your desk and identifying what each one does. Remove any cable that connects nothing or belongs to a device you no longer own. Then measure the actual distance each cable needs to travel. Most cables ship at six feet or longer, which creates unnecessary slack that no amount of bundling fully hides.
Shortening Cable Length to Eliminate Slack
Cable slack is the enemy of clean cable routing. For permanently installed cables like a monitor's DisplayPort or HDMI connection, buying the correct length replacement cable is the cleanest solution. For charging cables and USB connections that change regularly, a cable winder keeps the excess manageable without cutting anything permanently.
Color-Coding and Labeling Wires for Easy Identification
Color-coding is one of the most underused cable management techniques. Use colored electrical tape or pre-colored cable ties: one color per device category. For example, blue for monitors, red for power, yellow for audio, and green for USB peripherals. A label maker is faster if you have more than eight cables to manage.
According to OSHA's electrical safety guidelines for office environments, clearly identified cables reduce the risk of accidental disconnections and electrical hazards in workplace settings, which applies equally to home offices.
Step 2: How to Hide Power Strips Under Your Desk
Hiding the power strip is the single highest-impact step in any desk cable management project. Mount it under the desk and roughly half your cable management problem disappears.
The standard method uses a cable management tray mounted to the underside of the desk with screws or heavy-duty adhesive strips. The power strip sits inside the tray, and cables drop straight down from your devices without sprawling across the floor.
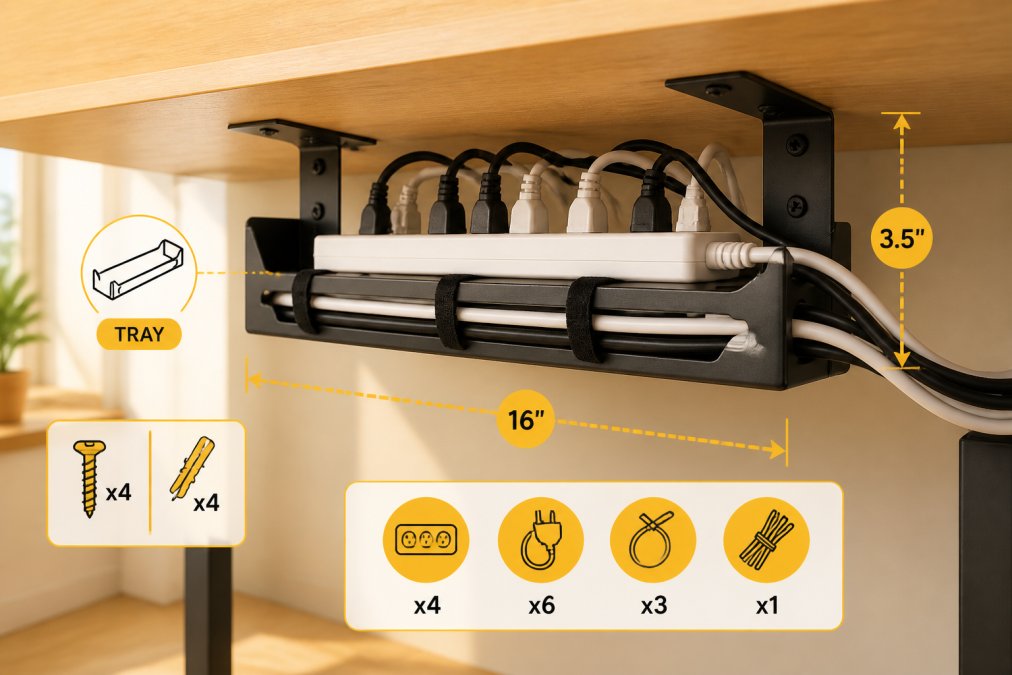
Before mounting anything, check your desk material. Solid wood and MDF desks accept screws well. Tempered glass desks require adhesive-only solutions. Hollow-core desks may not support the weight of a fully loaded power strip.
Mounting a Cable Management Tray to the Underside
A cable management tray is a basket or channel that attaches to the underside of your desk and holds cables, power strips, and adapters out of sight. Installation takes about fifteen minutes with a drill.
- Measure and mark the mounting position, centered under the desk and set back from the front edge
- Pre-drill pilot holes if your desk is solid wood
- Secure the tray with the included screws or adhesive pads
- Place the power strip inside the tray
- Route cables up through the tray's open top or side slots
- Bundle any remaining slack with velcro cable ties inside the tray
Using Adhesive Cable Clips to Route Cords Along Desk Legs
Once your power strip is mounted, adhesive cable clips hold individual cables flush against the desk leg or frame. Space clips every six to eight inches along the cable run to prevent the cable from swinging away and keep the path straight.
Step 3: Group and Conceal Cables with Sleeves, Raceways, and Trays
Grouping cables into bundles shifts cable management from functional to genuinely clean-looking. Individual cables create visual noise. A cable sleeve or cable loom consolidates multiple cords into a single, unified run.
Cable Sleeves and Loom for Bundling Multiple Cords
A cable sleeve is a flexible mesh tube that wraps around a bundle of cables. Cable loom is a similar product with a spiral wrap design that lets you add or remove cables without cutting anything open. For a desk with five or more cables running to the same area, a cable sleeve reduces the visual footprint dramatically.
Wall-Mounted Cable Raceways for a Clean Run
A cable raceway is a plastic or aluminum channel that mounts to a wall and conceals cables running from your desk to wall outlets or mounted monitors. Most cable raceways come with adhesive backing, which works on painted drywall without drilling.
The Consumer Product Safety Commission's guidelines on electrical cord safety recommend keeping electrical cords away from foot traffic paths and heat sources, both of which wall-mounted raceways help achieve.
Step 4: Manage Charging Cables on the Desk Surface
The desk surface is where cable management discipline breaks down for most people. Charging cables are the main culprit. The most practical solution is a dedicated charging zone. Pick one corner of the desk, mount two or three adhesive cable clips along the edge, and route all charging cables to that point.
A wireless charging pad eliminates the cable entirely for compatible devices. For a desk setup where multiple devices need daily charging, a multi-device wireless charging station reduces surface cables to a single power cord. Esther Tech Shop carries wireless charging accessories that ship within 24-48 hours.
For cables that need to stay accessible but not visible, a small cable management box on the desk surface holds excess cable length and a small power strip inside a closed enclosure.
| Cable Type | Best Management Method | Placement |
|---|---|---|
| Monitor / DisplayPort / HDMI | Cable sleeve + desk leg clips | Under desk, routed to tray |
| Power cables | Cable management tray + power strip | Mounted under desk |
| USB peripherals | Velcro ties + cable raceway | Along desk edge |
| Charging cables | Adhesive clips + wireless pad | Dedicated desk corner |
| Laptop charger | Cable spine or loom | Down desk leg to floor |
| Audio / headset | Clip-on cable holder | Monitor arm or desk edge |
Best Cable Management Tools for a Home Office Setup
Cable management tray: The highest-impact single purchase. A good under-desk cable management tray holds your power strip, hides your adapters, and gives every cable a destination.
Velcro cable ties: More useful than zip ties for any cable that changes occasionally. Reusable, fast to apply, and they don't cut into cables the way overtightened zip ties can.
Cable sleeves: Essential for any run with three or more cables traveling the same path. Braided fabric sleeves look the most professional.
Adhesive cable clips: The workhorses of surface cable routing. Buy more than you think you need.
Cable raceway: Required for any wall-mounted run. Available in white, black, and paintable versions.
Label maker: A labeled cable takes three seconds to identify. An unlabeled one takes thirty seconds of tracing and guessing.
According to the American National Standards Institute's structured cabling standards, proper cable identification and organization directly reduces maintenance time and error rates in professional installations, a principle that applies directly to home office setups.
Standing Desk Cable Management Ideas That Actually Work
Standing desks present a specific cable management problem that fixed-height desks don't: the cables need to accommodate vertical movement. A cable spine, a flexible conduit that attaches to the desk leg and extends to the floor, solves this. As the desk moves up and down, the cable spine flexes with it, keeping the cable bundle contained without restricting movement.
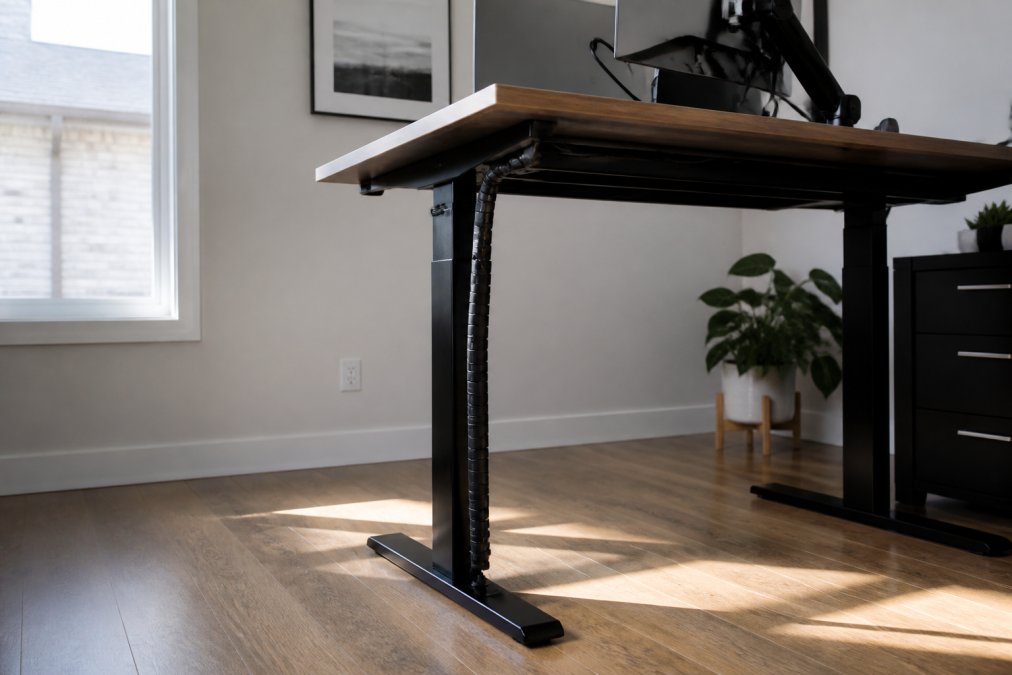
Measure the cable run at maximum desk height, not sitting height, then add six inches of extra length. This prevents any cable from going taut at the top of the desk's range.
How to Organize Desk Cables for Multi-Monitor Setups
Multi-monitor setups multiply cable volume fast. The most effective approach uses a dedicated cable management tray wide enough to span the full desk width. Route all monitor cables up through grommets or over the back edge of the desk, then down into the tray where they connect to a power strip and a video switch or dock.
A monitor arm with integrated cable management channels is the cleanest solution for the cables that run to the display itself. For a three-monitor setup, consider a dedicated USB-C dock or KVM switch that consolidates multiple video and data connections into a single cable run from your laptop or PC.
Common Mistakes to Avoid When Managing Desk Cables
Routing before auditing. Organizing cables you don't need is wasted effort. Always audit and remove unnecessary cables first.
Using the wrong adhesive. Standard adhesive cable clips are rated for specific surface types and weight limits. Overloading a clip results in cables dropping to the floor within days.
Ignoring cable slack. Bundling six feet of cable when you only need three creates bulk that no sleeve or raceway fully conceals.
Over-tightening zip ties. A zip tie cinched too tightly can damage the cable insulation over time, particularly on thinner USB and charging cables.
Treating cable management as permanent. Build in flexibility with velcro ties and removable clips wherever the setup is likely to evolve.
Skipping the standing desk slack calculation. A cable that's too short for the raised position will pull connections loose or pull the desk itself off balance.
A well-executed cable management system takes about ninety minutes to set up correctly and then requires almost no maintenance. The tools are inexpensive, the process is straightforward, and the result is a workspace that looks and functions better every day you use it.
Cord clutter compounds over time, and the longer a desk setup goes without a proper cable management system, the harder it becomes to untangle. Esther Tech Shop stocks the cable management accessories, wireless charging solutions, and desk setup tools you need to fix the problem correctly the first time. With orders shipping within 24-48 hours and customer service available Monday through Saturday from 9 a.m. to 8 p.m., you get the right products fast and support when you need it. Continue shopping at Esther Tech Shop and build the clean, functional workspace your setup deserves.
Frequently Asked Questions
What is the easiest way to neatly organize desk cables?
Start by unplugging everything and sorting cables by function. Measure each cable and replace any that are too long to reduce slack. Use zip ties or hook-and-loop cable ties to bundle cords together, then route them through a cable tray or raceway mounted under the desk. Adhesive cable clips keep individual lines flush against desk surfaces. Finishing with a cable sleeve over grouped cords gives the setup a clean, uniform look without much effort.
How do I organize standing desk cables when the height changes?
Standing desk cable management requires flexible solutions because the desk moves. A cable spine or retractable cable sleeve mounted to the desk leg gives cords enough slack to extend and retract as the height adjusts. Avoid rigid raceways fixed to the wall. Instead, use a cable management tray mounted directly to the underside of the desk so it travels with the surface. Leave a deliberate loop of extra cable length near the floor to absorb the full range of motion.
What are the best cable management tools for a home office?
The most practical tools include a cable management tray or basket for under-desk mounting, adhesive cable clips for routing cords along edges, hook-and-loop cable ties for bundling, and a cable raceway for longer wall runs. A cable management box hides power strips and excess cord length on or near the floor. For desk surfaces, a small cable organizer or weighted cable clips keep charging cables accessible without tangling. Check Esther Tech Shop for available accessories to complete your setup.
How do I hide a power strip under my desk?
Mount a cable management tray to the underside of your desk using screws or heavy-duty adhesive strips. Place the power strip inside the tray so it sits flush against the desk bottom and out of sight. Route each device cable up through a grommet hole or along the desk leg using adhesive clips. Use zip ties to keep the bundle tight. This approach removes the power strip from the floor entirely, reduces cord clutter, and makes vacuuming underneath the desk much simpler.
How can I manage charging cables on my desk surface without making it look messy?
Weighted cable clips or magnetic cable holders keep charging cables parked at the desk edge when not in use so they do not slide behind the desk. A small cable organizer or cable management box on the desk surface corrals multiple charging cables in one spot. For a cleaner look, thread cables through a desk grommet and route them under the surface, leaving only the connector tip accessible. Color-coding cables with label tags makes it easy to grab the right one without pulling out the wrong cord.
This article was written using GrandRanker